The Quest for the Perfect Hard-Boiled Egg: Say Goodbye to Gray Yolks and Stubborn Shells
For such a seemingly simple task, boiling an egg can be surprisingly frustrating. We've all been there: peeling away at a stubbornly stuck shell, only to reveal a discolored, greenish-gray ring around the yolk, or a chalky, overcooked interior. It's enough to make you give up on this protein-packed, versatile kitchen staple. But what if we told you that the secret to consistently easy-peel, vibrant-yolked, perfectly cooked hard-boiled eggs is within your reach? This comprehensive guide will empower you to
make perfect hard boiled eggs every single time, exploring five foolproof methods that guarantee delicious results, no matter your kitchen setup.
Hard-boiled eggs are a culinary chameleon, transforming from a quick, nutritious breakfast or snack into the star of deviled eggs, a creamy addition to egg salad, a textural delight in chopped salads, or a savory complement to potato salad. Even their softer counterparts – the jammy soft-boiled eggs – can elevate instant ramen noodles or add luxurious depth to grain bowls. Mastering this fundamental skill truly unlocks a world of culinary possibilities.
The Science Behind the Sunshine Yolk: Why Your Eggs Go Gray (and How to Stop It)
Before we dive into the methods, let's demystify why eggs sometimes turn unappetizing shades of gray. That greenish-gray ring around the yolk, often accompanied by a sulfuric smell, is a chemical reaction. It's caused by the iron in the yolk reacting with hydrogen sulfide from the egg white, typically due to overcooking or cooking at too high a temperature for too long. Similarly, rubbery egg whites are a tell-tale sign of excessive heat, causing the proteins to tighten too much.
The good news? Preventing these issues is remarkably simple. The key lies in precise timing and temperature control, combined with a crucial step often overlooked: an immediate ice bath. This rapid cooling halts the cooking process, preventing overcooking and the formation of that unsightly gray ring, while also making the eggs significantly easier to peel.
Mastering the Classic: The Foolproof Stovetop Method
While there are several excellent ways to cook eggs, the stovetop method remains the most universally accessible and, when done correctly, the most foolproof way to
make perfect hard boiled eggs. It’s all about a gentle start and a controlled finish.
Here’s how to do it:
1.
Cold Water Start is Key: Begin by placing your eggs in a single layer at the bottom of a saucepan. Crucially, add enough cold water to cover the eggs by at least an inch. Starting with cold water helps the eggs cook more evenly, prevents the whites from becoming rubbery, and significantly reduces the chance of cracked shells as the temperature rises gradually. For optimal results, use room-temperature eggs; taking them out of the fridge about 30 minutes prior can help them cook more uniformly and minimize cracking.
2.
Bring to a Rolling Boil, Then Rest: Place the saucepan over high heat. Once the water reaches a rapid, rolling boil, immediately turn off the heat, cover the pot tightly with a lid, and let the eggs stand in the hot water. This "boil-then-rest" technique ensures gentle, consistent cooking without the harshness of continuous boiling, which can lead to overcooked whites and cracked shells.
3.
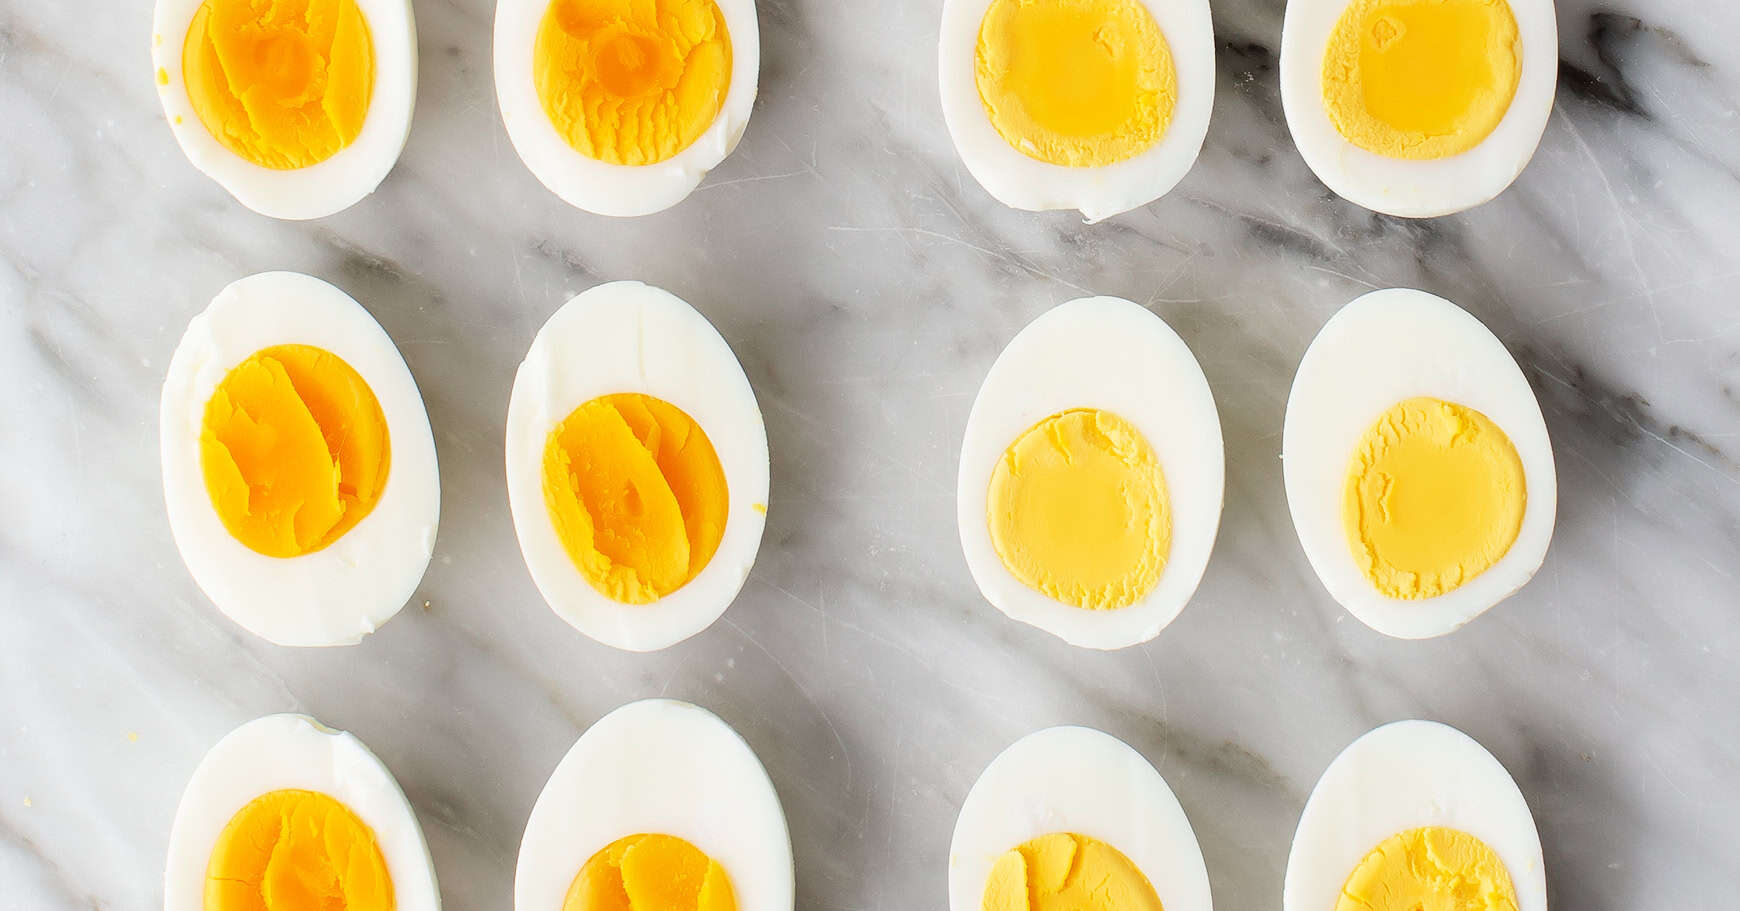
Timing is Everything: The duration of this resting period dictates the doneness of your yolk. These times are for large eggs at sea level; adjustments may be needed for smaller/larger eggs or higher altitudes (generally, longer cooking times are required at higher elevations):
*
Soft-boiled: 6-7 minutes for a runny, silky yolk.
*
Medium-boiled (Jammy): 9-10 minutes for a mostly set yolk with a delightful, gel-like center. This is a popular choice for ramen or avocado toast!
*
Firm-boiled: 12-13 minutes for a firm yolk that still has a hint of softness.
*
Hard-boiled: 15-17 minutes for a fully hardened, vibrant yellow yolk – no gray allowed!
For a more in-depth look at achieving specific yolk textures, you can
Unlock Perfect Hard-Boiled Eggs: Timing for Soft to Firm Yolks.
4.
The Essential Ice Bath: Immediately after the resting time, drain the hot water and transfer the eggs to a bowl of ice water. Let them cool in the ice bath for at least 5-10 minutes. This critical step halts the cooking process, preventing the dreaded gray ring, and helps the membrane beneath the shell detach, making them incredibly easy to peel.
For a deep dive into mastering this stovetop technique, check out our guide:
Master Perfect Hard-Boiled Eggs: Our Foolproof Stovetop Guide.
Beyond the Pot: 4 Alternative Ways to Make Perfect Hard-Boiled Eggs
While the stovetop is classic, modern kitchens offer other convenient methods to
make perfect hard boiled eggs, especially for batch cooking or specific preferences.
1. Instant Pot Hard-Boiled Eggs
The Instant Pot is a game-changer for consistently easy-to-peel eggs. The pressure helps separate the membrane from the shell, and the consistent temperature ensures even cooking.
*
Method: Place 1 cup of water in the Instant Pot. Arrange eggs on a trivet (you can stack them carefully).
*
Cooking: Cook on High Pressure for 5 minutes.
*
Release & Cool: Allow for a 5-minute natural release (NPR), then manually release the remaining pressure. Immediately transfer eggs to an ice bath for 5 minutes. This "5-5-5" method is incredibly popular for a reason!
2. Oven-Baked Hard "Boiled" Eggs
Ideal for cooking a large batch without needing a giant pot, the oven method is surprisingly effective, though it produces a slightly different texture than truly boiled eggs.
*
Method: Preheat oven to 325°F (160°C). Place eggs directly into muffin tins (this prevents them from rolling around and cracking).
*
Cooking: Bake for 25-30 minutes for firm yolks.
*
Cool: Immediately transfer to an ice bath for 5-10 minutes. *Note: You might notice tiny brown spots on the whites, which is normal for this method and doesn't affect taste.*
3. Slow Cooker Hard-Boiled Eggs
For a hands-off approach, the slow cooker offers a gentle, low-heat cooking environment.
*
Method: Place a kitchen towel at the bottom of your slow cooker to prevent cracking. Arrange eggs on the towel, then cover them with water.
*
Cooking: Cook on HIGH for 2-3 hours or LOW for 4-5 hours.
*
Cool: As always, transfer immediately to an ice bath.
4. Air Fryer Hard "Boiled" Eggs
The air fryer provides another convenient, dry-heat method, especially if you want to avoid boiling water altogether.
*
Method: Place eggs directly into the air fryer basket in a single layer.
*
Cooking: Air fry at 250-275°F (120-135°C) for 13-17 minutes, depending on your desired doneness and air fryer model. Start with 15 minutes and adjust.
*
Cool: Promptly move to an ice bath for 5-10 minutes.
Pro Tips for Easy Peeling and Consistent Results
Beyond the cooking method, a few simple tricks can dramatically improve your hard-boiled egg experience:
*
Older Eggs Peel Better: Contrary to popular belief, farm-fresh eggs are actually harder to peel because their inner membrane adheres more tightly to the shell. Eggs that are a week or two old tend to peel much more easily. To check if an egg is still good, perform a "float test": place it in a bowl of water. If it sinks, it's fresh. If it stands on end, it's older but likely still fine for cooking. If it floats, it's likely spoiled and should be discarded.
*
Room Temperature Eggs: Taking eggs out of the refrigerator 30 minutes before cooking allows them to come to room temperature, reducing the thermal shock when they hit hot water and minimizing cracks.
*
Altitude Adjustments: At higher altitudes, water boils at a lower temperature, meaning it takes longer to cook eggs. You'll need to increase your cooking times slightly – usually by a few extra minutes for every few thousand feet above sea level.
*
The Peeling Hack: Once cooled, gently tap the wide end of the egg on a counter to crack the shell. Roll the egg gently between your hands to create more cracks all around. Peel under cold running water; the water helps separate the membrane from the egg white, making the process smoother.
*
Storage: Properly cooked and cooled hard-boiled eggs can be stored in the refrigerator for up to one week, either peeled in an airtight container or unpeeled.
Unlock the Versatility: More Than Just a Snack
Now that you know how to consistently
make perfect hard boiled eggs, it's time to put them to good use! Beyond simply enjoying them with a sprinkle of salt and pepper, consider these delicious applications:
*
Classic Deviled Eggs: The quintessential party appetizer.
*
Creamy Egg Salad: Perfect for sandwiches or wraps.
*
Hearty Salads: Add sliced or chopped hard-boiled eggs to Cobb salads, Nicoise salads, or any green salad for a protein boost.
*
Potato Salads: A beloved addition for extra texture and richness.
*
Garnish & Grains: Halve soft-boiled eggs for a runny yolk on avocado toast or grain bowls.
*
Curries & Stews: Whole hard-boiled eggs are a fantastic, protein-rich addition to many Indian and Asian curries.
*
Quick Protein Fix: Keep a batch in the fridge for a grab-and-go snack or a post-workout boost.
Mastering the art of the hard-boiled egg is a truly rewarding kitchen skill. With these methods and tips, you can confidently bid farewell to gray yolks and stubborn shells. Experiment with the different techniques to find your favorite, and enjoy the delicious, versatile rewards of perfectly cooked eggs.